About Me

My photo
From Rugby, Warwickshire; Went to Marlborough Secondary School; Studied at Rugby College of Engineering Technology; Worked at HM Forces - British Army; Studied at Royal School of Military Engineering; Former Maintenance Technician at International Computers Limited; Former IT Support at GlaxoSmithKline Pharmaceuticals Ltd; Lives in Letchworth

Pages

Saturday, 15 March 2025

Bachmann / Model Rail USATC S100 Tank sound fitting

 This is a very straight forward installation; 2 screws long one the front short one to the back hold the body in place. The Zimo MS500N sound chip and a Minnow4 15x8x4.5 speaker from https://www.youchoos.co.uk/ only have the speaker wires (purple) the remaining wires were removed. The Minnow4 slips in-between the gear tower and PCB riser, it is necessary to shorten the pins on the MS500 to 4 millimetres long pin 1 is to the right as you look down it is marked, and wrap the chip with 20 mm Kapton tape other than that it’s plug and play.


SECR P Class 0-6-0T 323 'Bluebell' sound fitting.

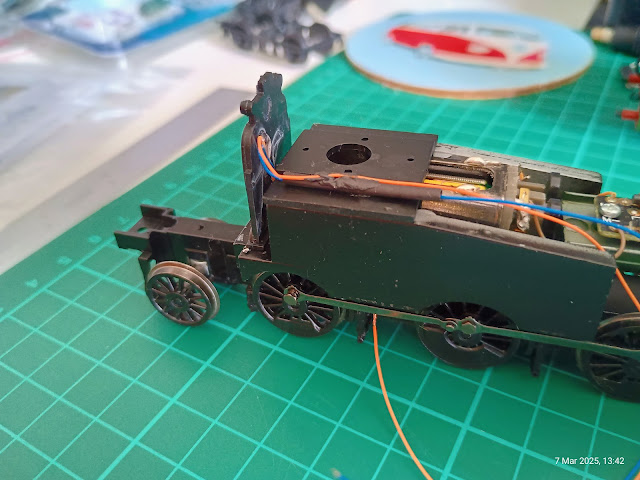
 My Hatton’s now Accurascale ‘Bluebell’ is now fitted with a Zimo MS500N sound chip and a Minnow 4speaker from https://www.youchoos.co.uk/. Except for the speaker wires (purple) the remaining wires were removed.

Remove 4 screws from the chassis to release the body there 2 at the front 2 at the rear. The speaker fits in the Left hand side of the chassis after removing the small weight I stuck a sliver of 1 mm plastic card to insulate the speaker from the cast chassis.


It was necessary to remove approximately 3 millimetres from the cast chassis where the chip would fit this was to enable sufficient clearance I also deepened the slot where the interface board sits pin 1 is to the top of the board. I machined mine in a milling machine and deepened the slot with a hacksaw; the casting is quite robust holding it in a vice gently was not an issue so carefully cut it away with a hacksaw is a possibility. 


Finally I lined newly milled area with 1 mm plastic card to insulate the chip from the chassis. It is necessary to shorten the pins on the MS500 to 4 millimetres long and wrap the chip with 20 mm Kapton tape. The Minnow4 15x8x4.5 is held in place on the plastic card with double sided tape.


Sunday, 9 March 2025

Hornby Sentinel 0-6-0 sound fitting.

 Hornby Sentinel 0-6-0 sound fitting.

Another straight forward conversion first remove the 4 body fixing screws, the body just pulls away mine was a little tight. I trimmed the orange and white wires again sealing the end with a short length of heat shrink tube.

This time I chose the Zimo MS500N sound chip and a Microcube 12x8x7 speaker this fits nicely behind the motor held with double sided tape. Wrapping the chip with 20mm wide Kapton tape. Carefully position the wrapped chip on top of the motor again secured using Kapton tape, once again no major surgery to the model.


Saturday, 8 March 2025

Bachmann GWR Class 56xx sound fitting

This is a quite straight forward exercise first remove the NEM pockets to reveal the body fixing screws, the body just pulls away.


I opted for firebox glow this time the backhead is glued to the chassis you need to gently prise the backhead away off the chassis mine broke off the locating pins (easy fix just drill out the broken part in the chassis and fit a new pin into the back head of course you will have to carefully drill a hole for it I used a 1.5 mm drill) make a hole in the firebox doors I suggest 2.5mm to allow the glow from the LED to show. Glue to cables to the back of the back head and cover the LED with blacktack and reattach to the chassis.


I chose the Zimo MS480R sound chip and a Sugarstrand 25x09x06 speaker. It is necessary to unsolder the green and blue wires from the 8 pin plug these are connected to the fire box glow LED with a 1K resistor in the blue wire. Due to the limited space cut back the stayalive wires sealing the end with a short length of heat shrink tube. Attach the speaker to the flat plate in front of the backhead with double sided tape. 


Plug in the chip and tidy the wires over the chip and secure with Kapton tape. A simple and elegant installation with no major surgery to the model except the 2.5 mm hole!

Wednesday, 18 December 2024

Dapol Class 121Slipping Drive

 18/12/2024

This is the second time the drive shafts have failed! The knuckle on the end of the shaft just slips. Unfortunately there are no spare parts available at the time of writing. Fortunately I have the old set from the previous failure I cleaned the parts in isopropyl alcohol run a triangular needle file across the mating portion of the shaft and glued the knuckle with cyanoacrylate. That didn’t work Dapol will supply them on an exchange basis. So the loco and the defective drive shafts are going back after the holidays


 UPDATE

Replacement drive shafts have arrived back; I’m glad to see that the design has been changed. To my mind this is a much better design.


Sunday, 15 December 2024

Restoration and rebuild of Western Hills station part 2


I Sprayed the completed lights poles with Halfords rattle can Rover Damask red which is a close proximity to LMS maroon, next is to fit all those fiddly little LEDs. Meanwhile I've sprayed 18 GWR style platform benches from model railway scenes with Halfords rattle can Rover Russet brown a close proximity to GWR chocolate.


Saturday, 14 December 2024

Restoration and rebuild of Western Hills station


14/12/2024

 Continuing with the restoration and rebuild of Western Hills station I needed some station lights I have a bag full of cheap and cheerful eBay station platform lightswhich are a scale height of around 10 feet. They just don't look right so I decided to use evergreen plastic extrusions to fabricate some new lights. They will be a scale height of around about 14 feet I commenced by cutting 3/32 inch round tube to 67 millimetres long for the pole next I need a base so I used 1/8 inch square tube bored out to 3/32 inch to length of 15 millimetres lastly a collar made from 1/8 tube two millimetres long again bored out to 3/32 inch.


Assembly quite straight forward slide the square base up the tube leaving 15 millimetres protruding.  Slide the collar on the top leaving around 2 millimetres protruding run liquid cement around the joints. The next task is to disassemble the cheap and cheerful Chinese lights. All we need to keep is the globe and the top cover. I cut the spigot off the top cover which allows them to come away from the pole.

For the light source I used miniature micro LED’s type 0402 pre-wired from eBay they are so very tiny.